Quick start
- Purchase or activate a valid license from the dashboard.
- Copy the highlighted TradingView Webhook URL.
- Download and start the Windows application.
- Enter your license key and click Connect.
- Enable NinjaTrader 8 Automated Trading Interface (ATI).
- Paste the webhook URL into a TradingView alert.
NinjaTrader ATI setup
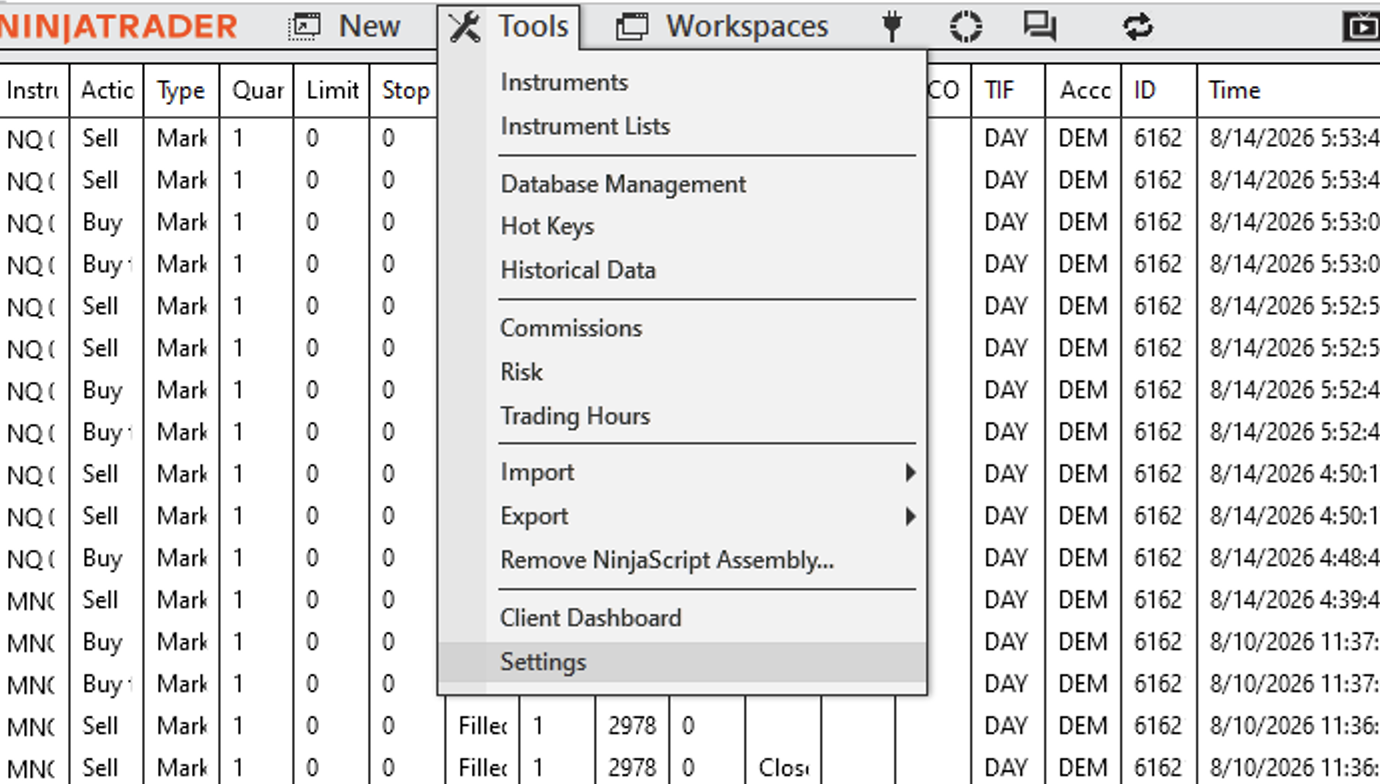
Enable NinjaTrader's Automated Trading Interface before connecting the desktop application.
 Open full size
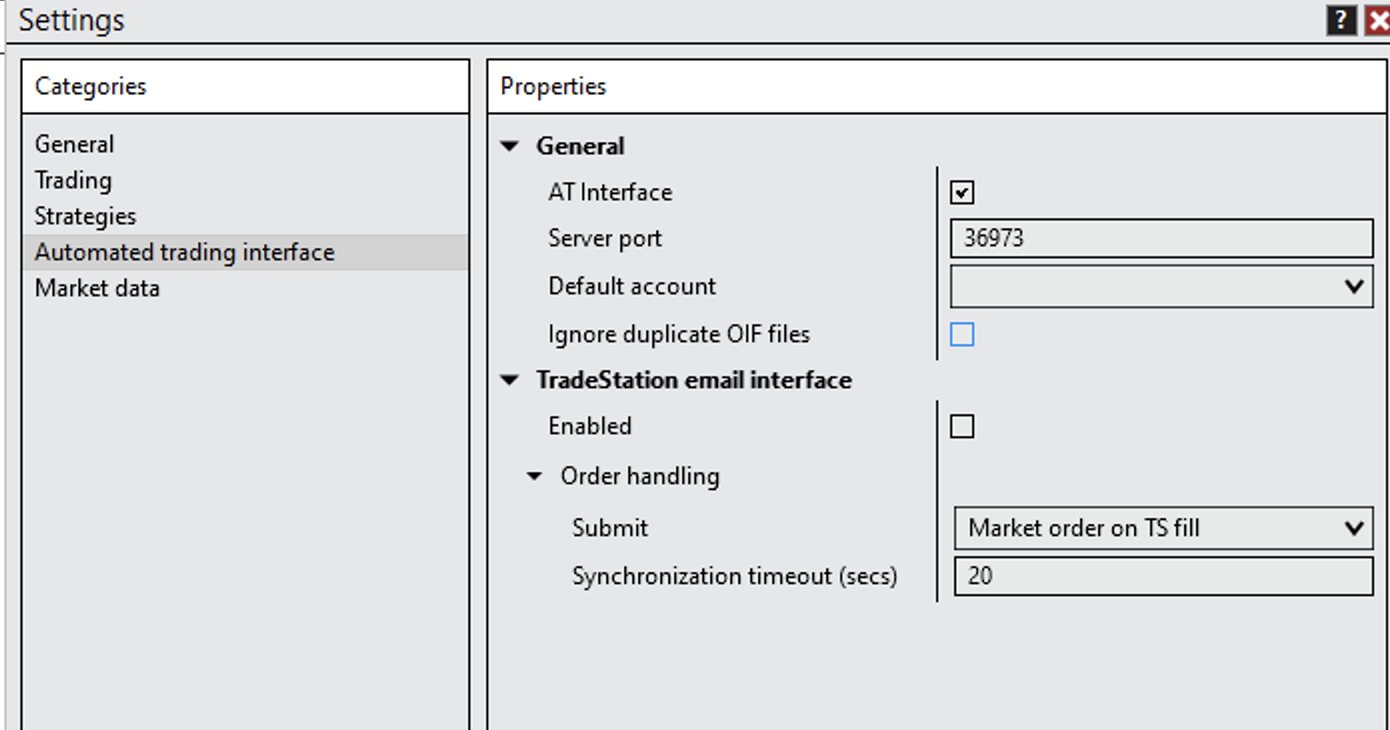
In Settings, select Automated trading interface from the Categories list. Under General, enable AT Interface, confirm the server port, and choose the default account.
 Open full size
Save the settings, restart NinjaTrader, and keep it open with ATI enabled while the desktop application is connected.
TradingView alert message
Use a JSON message like this in the TradingView alert:
{
  "account1": "Sim101",
  "action": "sell",
  "quantity": "10",
  "symbol": "NQ 09-26",
  "previousclose": "true"
}
previousclose: "true" closes the current position first. If quantity is zero, only the close is sent and no replacement order is opened.
Desktop application
The application makes an outbound secure connection to the server. It does not open a local listening port and does not require router configuration or port forwarding.
- Keep the application running while you want to receive alerts.
- Keep NinjaTrader open with ATI enabled.
- Use the activity log to see alert time, local OIF processing, and delivery status.
- The server queue remains durable if the desktop reconnects.
Connect up to 10 NinjaTrader accounts
You can send the same TradingView alert to as many as 10 NinjaTrader accounts. Add the account names in account1 through account10. The names must match the account names shown in NinjaTrader exactly.
- Open NinjaTrader and confirm each account name.
- Put the first account in
account1, the second inaccount2, and continue in order. - Leave unused fields empty or set them to
none. - Keep the desktop application connected and make sure ATI is enabled.
Example using all 10 accounts:
{
  "account1": "Sim101",
  "account2": "Sim102",
  "account3": "Live01",
  "account4": "Live02",
  "account5": "Prop01",
  "account6": "Prop02",
  "account7": "Test01",
  "account8": "Test02",
  "account9": "Backup01",
  "account10": "Backup02",
  "action": "sell",
  "quantity": "10",
  "symbol": "NQ 09-26",
  "previousclose": "true"
}
For each valid account, the application writes the requested NinjaTrader OIF file. With previousclose: "true", it closes that account's existing symbol position first and then opens the new order. If quantity is 0, it closes the existing position only.
Accounts are processed from account1 to account10. An invalid or empty account name is skipped and reported in the desktop activity log.
Local testing with Insomnia
Send a POST request to your local webhook endpoint with a JSON body matching the TradingView format. Confirm that the API returns HTTP 202 and that the desktop application receives the alert.
Never publish a real webhook URL in screenshots, source code, or public chat. Regenerating a URL invalidates the old URL.
Troubleshooting
- License rejected: confirm the subscription is active and copy the license key exactly.
- No alert: verify the TradingView URL, JSON field names, and desktop connection status.
- No order file: confirm NinjaTrader ATI is enabled and the account name matches exactly.
- Reconnects: check Windows internet access and allow the application through endpoint security.